Wednesday, August 10, 2011

Living Wall

These are all the rage in the design circles these days. I made this 'smaller scale' living wall from reclaimed PT fence boards that someone had kept out on the curb on garbage day. The inner section is lined with plastic and a lightweight potting soil was added with a coir mat to hold it all in. A frame finishes it all off.

The homeowner loves gardening... These are drought resistant succulents

Side View

Size in relation to the front door. The plants are yet to 'grow out'

Dhiraj

If you are looking for solutions for your home, contact us about our design, build & decorate services.

Sunday, August 7, 2011

Deck Build - Rear Deck

This is the rear deck and the deck that got the whole conversation started. Built using the same design principle as the front deck, I added a wrap around step that doubles up as a seating during parties....

As with the other two areas, lights come on at dusk....

This deck is 20' x 10' and like the front, spans the entire width of the house. I maintained only one wrap around on the main level as the width of the deck forced me to use staggered joints.

The additional platform makes for a fluid transition from the side deck to the rear deck.

Close up of the decking pattern on the platform

Close up of the stairs

This 'bench' came about from the homeowners need to have the basement windows left uncovered. This posed a problem as they also have a 1 year old grandson. My solution.... a bench that can be flipped over when he visits - keeping him safe.

Faux 'campaign' style made by joining two scrap 2x10's in a X pattern. Additional bracing means that the bench can actually be used.

Dhiraj

If you are looking for solutions for your home, contact us about our design, build & decorate services.

Living Space - Outdoor Kitchen

In it's original configuration, the side passage housed the BBQ and potting accouterments (the homeowner is an avid cook and gardener). I sought to bring together both of these endeavors by creating an outdoor kitchen and potting bench that flanked the BBQ. I took the 'outdoor kitchen' one step further by adding a sink with running water and shelves that would in normal circumstance hold utensils. Here, they hold plants. The final touch were the lights that come on automatically at dusk.

If the look seems industrial, it's because the wood is Pressure Treated, the hardware is galvanized and the counter tops are Stainless Steel. All materials that were chosen to withstand the vagaries of Canadian weather.

The plumbing is simple, and can be disconnected before the first frost. The drain has no P Trap as there are no sewer gases to hold back. The drain pipe runs to the rear of the garden and is perforated along it's entire length to irrigate the garden as it drains.

Outdoor Kitchen

Close Up

Kitchen Sink with running Water - Stainless Steel countertops were custom fabricated by a local plate shop

Simple plumbing allowing disconnection in winter

Garden irrigation

Night shot with lights

Another dusk shot

Dhiraj

If you are looking for solutions for your home, contact us about our design, build & decorate services.

Deck Build - Side Passage - A/C Cover

This is a cover that I built for the A/C. It also hides the existing plumbing that I moved down to the unit's height. The cover is removable and can be moved should the A/C require servicing.

Before - Old and oxidised A/C unit

After - All covered up... 

Adequate venting from the side allows the unit to breathe

From Below - Louvered section allows for air to blow through

Dhiraj

If you are looking for solutions for your home, contact us about our design, build & decorate services.

Deck Build - Side Passage

This deck was initially not planned for. I convinced the homeowners to allow me to remove the steps from the garage and the back door and install a single platform step that would allow easier access to the garage from the back door without having to step down and then up again. The homeowner then asked if I could build a surface deck to cover the aged patio stones. Sure I could.... and I did!!!

Here are some before and after pictures.

Before - Uneven concrete pavers - some broken, most cracked down the center.

Before - 2 mismatched sets of stairs. One wood and the other concrete. Heights did not match. The wooden one was loose, causing a trip hazard.

After - A larger platform step at the rear make entry and exit into the Garage or House, a Hands-Free affair. The A/C unit has since been covered and the hose relocated.


A Before and After View of the space

Details - Top Left, Gas BBQ hookup - Top Right, Window well wrap - Bottom Left, Power Ingress - Bottom Right, Gas shut off


More to follow on this space......

Dhiraj

If you are looking for solutions for your home, contact us about our design, build & decorate services.

Saturday, August 6, 2011

Deck Build - Front Porch

Just had the time and the inclination to blog one of the projects that I had completed a while ago. This is a low deck that I built for a customer. We went with a lower height that removed the need for stairs and had just one step up to the main door. Concept, design and execution by myself (non-shameless plug!!!) I'l let the pictures do the rest of the talking.

Looking from the driveway towards the main door. This Deck has a width of 18 feet and a depth of 8 feet. The extra deep and wide stair at the top allows for easy entry and exit into the house.

 Looking from the front. The Power Auger that was used to bore the holes for the footings, tore up the lawn. This has since been remedied by the homeowner.

Closeup of the step.

 I wrapped the first three courses of Deck boards around the outside perimeter of the deck. I did this for two reasons. The first is to ensure that no raw edges or board ends are visible. The second is so that I could used full 16' lengths thereby removing the need to have butt joints on the entire deck. The real other reason is that it just looks damn good!!!! All board edges were routed with a 1/2" round-over bit to match the existing profile on the deck boards.

A few days later, the homeowner had already planted trees, mulched, composted, reseeded and decorated the deck.

At dusk, recessed LED lights illuminate the deck around the step......

and the perimeter....

Dhiraj

If you are looking for solutions for your home, contact us about our design, build & decorate services.

Sunday, April 10, 2011

Basement Build - Drywalled, Mudded, Taped & Primered

I keep forgetting to carry my camera along and did not get pictures of the basement being drywalled and the separate taping and mudding sequences. I drywalled all by myself, but got in the pros for the taping and mudding. My carpal would not look too kindly on the pressure on my wrist. It took almost a week for the  basement to be completely taped, but the result is nothing short of amazing.

I primed soon after, and these are the pictures after the first coat.

West wall and television alcove 

South wall 

East Wall 

North Wall and looking towards the passage and entrance  

Looking into the passage

The passage

Dhiraj

If you are looking for solutions for your home, contact us about our design, build & decorate services.

A Stain in the Glass

I have been, since the past 6 years, moving around three stained glass panels. These were shipped to Dubai  from Bombay, then to Bahrain and finally to Canada. They are the last remaining fragments of what was once 'Carl Villa' - the house that my grandmother lived and passed away in. The house was a family property that sheltered four families. My grandmother lived on the ground level facing North. The house holds a special place for me as I lived there with my grandparents for a couple of years as a child. After that we (my brother & I) passed by every morning on the way to school to greet my grandparents and stopped by after school for lunch before journeying onward to Bandra and home.

When the house was finally sold to developers and the building was being demolished, I convinced my mother to save the stained glass panels for me. It took a lot of doing, but the carpenter managed to get them out in one piece.

We decided not to have the units refinished as they so have much history. Every layer of paint probably contains volumes of stories about the good and bad times in Carl Villa. It also probably contains lead!!!!

So. They've been sitting in our crawl space, while we've tried to figure out the best place for them to go. This evening Lynda played around with some newspaper templates and we agreed on a suitable location. On account of the weight of the panel, I had to go with a sturdier method of hanging it on the wall than just D hooks or wire.

I ripped a piece of 3/4" ply and ripped it again down the center at a 35 degree angle. The angle was not so important, I just needed a mating pair.

Here in pictures is the process and outcome.

The template on the wall

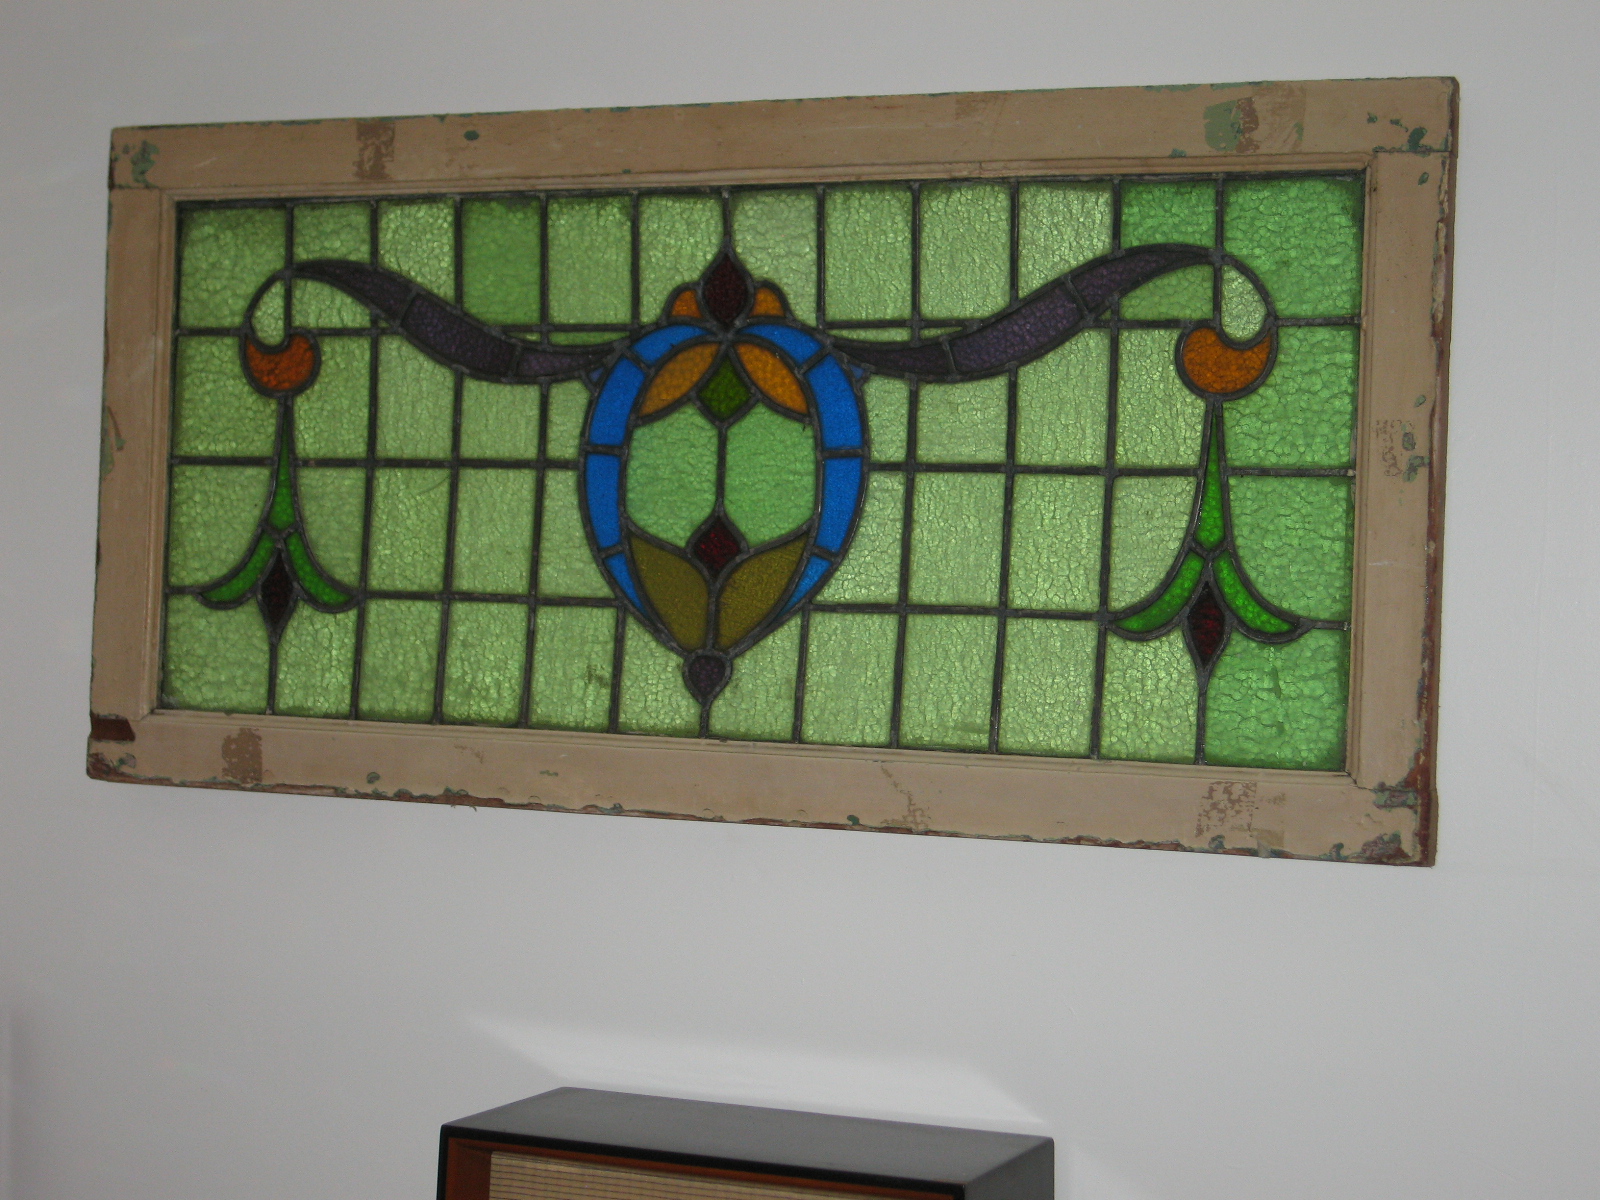
Stained Glass panel on the table


1st part of the bracket on the wall

 Mating unit and spacer at the bottom affixed to the panel

 This is how the wall part looks when affixed to the wall

Mating part fixed to the panel

 And dropped in place

 The panel on the wall

Close Up

Dhiraj

If you are looking for solutions for your home, contact us about our design, build & decorate services.

Thursday, March 10, 2011

DIY Ring Flash

Just started building my ring flash which I believe will work great for macro and portraiture. It's not something that I need, but more of something that I'd like to make just to see what the results will be.

I'm following instructions from Craig White and Roy Niswanger and making modifications of my own based on locally available supplies.

The first thing that I had to change was the main reflector. Both the instructions call for a 11 inch clamp reflector shop light. Couldn't find this anywhere, so I subbed it with a 12 in stainless salad bowl from the dollar store. I had picked up the duct reducer some time before and I made the hole in the bowl to mate the two together. I've only just started cutting out the hole where the flash will fire through. Will post those pics as the project commences.

As I already have the off camera flash and the TTL sync cord, I expect that the entire build will come under CAD 15.00. Compare that to some of the professionally available flashes which start at USD 100.00.

 Salad Bowl - No Frills Dollar Store section. CAD 2.00

Don Park 4"-5" HVAC Duct Reducer CAD 9.50. I thought this pricey

Reducer on Bowl action - Templating in Nerdspeak

Cutting the opening for the reducer to fit

Methinks this is a neat cut

Test fit
Related Posts Plugin for WordPress, Blogger...