Sunday, April 13, 2014

Mississauga Basement Build - Final Pictures

I finally went in with my T3i and got better pictures of the finished product. The ones from my phone did not look so great once enlarged. The lens on this is the one that came with the camera. A 18-55 'kit' lens not really made for architecture, which is obviously evident by the curved walls. I assure you.. my walls were built straight, plumb and level.

This is looking from the far end of the basement. The stairs are to the left. To angled projection was made to disguise one of the steel columns that support the upper two levels.

The door to the right of the projection leads to what is a spare room built as a storage room or prep room during parties. During the build, the customer opted to upgrade the baseboard to 5" high ones.

Not much to say here. The room is a standard size. 10' x 10' me thinks.

A built in closet measuring 5' x 80" with mirrored sliding doors.

I built in closet organisation with shelves to the left and hanging and a shelf to the right.

This is what I did with that projection. A pass through niche with casing to match the existing casing on all of the doors. A low voltage halogen puck light controls the ambiance. The 'sculpture' is a piece of birch that I selected and harvested from my birch tree. The base was cut from a 2x8 and chamfered 15 degrees on all sides and the spike is a gutter nail.

This is looking straight down from the stairs and into the furnace area. The client wanted these door to be different. Double doors were installed to accommodate the temporary housing of the treadmill during parties.

This is another closet that was built to house shoes and linen. While it may not seem like the greatest idea to store linen and shoes together, this configuration is two discrete spaces unified by a common sliding door. No animals were harmed in creating this space. That is a 'faux' carpet.

Shoes to the left. Linens to the right.

The main area is L shaped. This is kept unfurnished for dancing etc.

Looking at the main area from the TV area. The Treadmill will be a constant feature on account that the children are runners and this allows wintertime training.

The viewing area. I bumped out the wall to accommodate an area for receiver and other electronics. This allowed all of the cabling to be invisible. A 'mantle' was built to emulate a fireplace. Split faced travertine was installed to give that stacked stone effect. 

A sectional on the other end of the room makes for relaxed viewing.

View of the TV from the Treadmill. The TV can be pulled out and swivelled to face the treadmill.

In the original plan for the basement, I was to only provide a rough in for the bar plumbing. I had promised the client a feature wall for the Bar are at the onset. I achieved this by harvesting boards from used pallets and nailing them to the walls in a random pattern.

After much deliberation, the client left it in my hands to build something to match the space. I've covered the build in a separate post.

I've been a proponent of LED's since the early nineties, being an early adopter of some of the earlier failures as well. I really wanted to work in the new RGB strips and I think i did it to great effect.

Both upper and lower cabinets were custom built in situ.

A hammered copper sink was chosen for the project along with an oil rubbed bronze faucet. These were ordered from the United States.

I installed pegs at an angle, glued and pinned them in place to support wine bottles.

On both sides!!! Oenophiles take note of that ever so important incline to keep the cork well hydrated!!! Though with the prevalence of screw tops, this might not be so important......

The niche into which the customer chose to display her collection of decanters

The bar rail is Oak and was by far, the most expensive piece of the entire unit. The bar top is tiled with travertine subway tiles.

The business end of the bar has three discrete sections that flare inwards on account of the design. On the left is a bar fridge and a wine cooler

The devil is in the details. I spent an hour cutting and dry fitting 8 tiles just to get the design right.

Finally a little whimsy. I identified this board with the manufacturers stamp branded into the board. I kept it aside and installed it in a place of prominence

Custom built doors were installed on the entire unit. The grille or jali is stamped MDF

Close up.

The washroom is small, but houses a 32 x 60 glassed in stand up shower and shower bench. The mirror was provided by the client.

Shower stall

Shower niche

Shower seat


Dhiraj

If you are looking for solutions for your home, contact us about our design, build & decorate services.

Monday, April 7, 2014

Mississauga Basement Build - Raising the Bar

The drywall is taped and the joints are mudded and sanded. The paint went on with the electrical and finally the floor was laid. The initial plan was to have just the wet bar rough in and store bought cabinets installed on the wall.

But.... that well defined bulkhead and my infallible hubris demanded a custom solution......

I started off with measuring off the bulkhead and designing around those dimensions. We had decided to incorporate a Bar Rail that would impart a more professional look and would allow the guests to rest comfortably against the bar.
I built the bar with three discrete units that I bolted together. The carcasses are made from 3/4 ply and stand on adjustable kitchen legs. This allowed me to level the entire unit over the uneven basement floor.
Another view from the front. I bolted the raised platform over the three joined units and then dropped the counter top over the top 


I then tiled both surfaces with an intermediate waterproofing layer. Since we needed limited quantities of tiles, I sourced all tiles from the ReStore
Next I clad the front face with plywood and drywall and installed split faced travertine tiles. This was owner supplied


The upper and lower cabinets were made from 3/4 Pine and 3/4 Plywood respectively. The doors were handmade and the grille in 1/8  MDF that I carried across from New York.

Rails and Stiles for the doors cut, and ready to be assembled
Doors all assembled and glued and nailed together

Dhiraj

If you are looking for solutions for your home, contact us about our design, build & decorate services.

Tuesday, March 4, 2014

Mississauga Basement Build - Drywall, Mud & Tape

And finally, drywall.

The drywallers finished the install over two days. Ceiling goes up first, followed by walls.

This 'bump out' will house the TV and A/V components. Cat 6, Rg6, speaker cables & subwoofer cables are all in place. My preferred insulation is Roxul, which is fire & moisture retardent.

These guys were crazy fast, but I did catch them on mistakes. Speed is not everything!!!! 

 First coat of mud

 More mud

It's really all just muddy now.

Dhiraj

If you are looking for solutions for your home, contact us about our design, build & decorate services.


Mississauga Basement Build - Framing

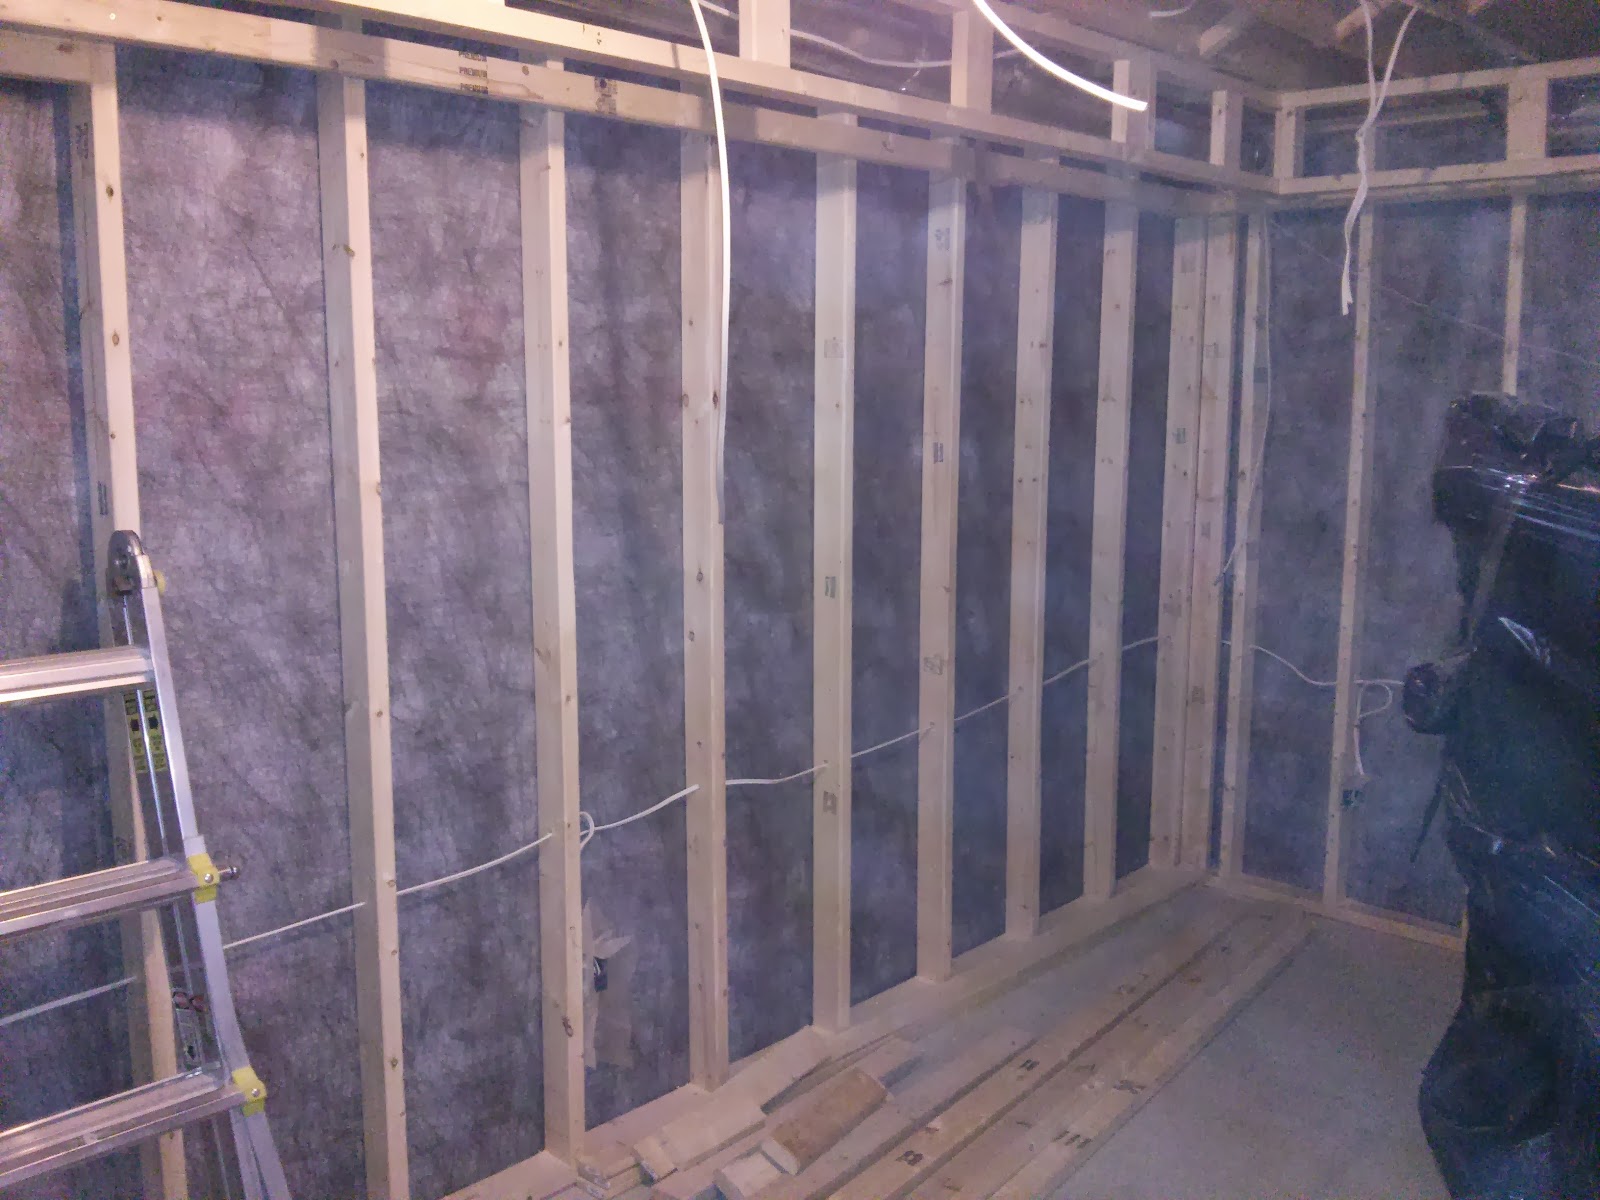
And so it starts. Mike came in on the third day and started with the two plumbing stacks. We try to get as much as we can think of prior to going into the job, but something always gets left out and a couple of runs to the HD are quite normal.


This is what CAD 700.00 of DWV  fittings looks like.....

The walls were first wrapped with house wrap which is a semi permeable membrane that keeps drafts and moisture out while allowing the concrete to breathe. The old method is to use tar paper, but the seams allow drafts through. house wrap is more expensive, but a better alternative.  

More fittings. Mike & I like to pretend that we are professionals........ Quite fitting!! 

Though there just a small area that needed a bulkhead to cover the pipe, I took the liberty to define the bar area with a bulkhead. This would be my undoing.......
Stay tuned for more drama!!!!!!!!!!!!

The spare room. That's my compressor. She just's sits there. Don't mind her. She's under a lot of pressure!!!!

More framing. As you can see, this is getting exciting!!!!!

This will become the shoe and linen closet. 

Looking into the washroom area 

 The shower controls and a shampoo niche. Though it's customarily called a shampoo niche, I'm pretty sure a conditioner would be invited here as well.

The stack relocated.

The furnace room opening was made to accommodate double doors to allow the treadmill to be stored during parties.

In the spare room, looking into the closet.

Dhiraj

If you are looking for solutions for your home, contact us about our design, build & decorate services.

Mississauga Basement Build - As Is

This Fall, I embarked on a basement job in the Lisgar area of Mississauga. The build encompassed low voltage wiring as well as LED lighting, a dedicated bar area, a washroom with a stand up shower, dedicated storage for shoes and linen as well as a spare room with it's own closet.

These are as-is pictures from the first day.

The first order of the day was to remove the builder installed blanket insulation. This is standing near the stairs and looking into the main area.

My able assistant Kraij, getting started on the insulation

Looking into the furnace room from the stairs. The previous owner had attempted to complete the basement on their own. The steel framing has to go and the furnace will be moved a foot and the A/C unit flipped in order to clear the window and optimize the space.

The stairs are builders grade pine.

The far corner is the planned location for the washroom. A stack in the far corner will have to be relocated to accommodate a full 32 x 60 shower.

 The lower half of the insulation was falling off

 More steel framing against the blanket insulation. What a waste of space

The return air duct in the ceiling from the upper level will have to be relocated 

 View towards the furnace room and the cold room door

Another view

The plumbing stack in what will be the bar area. This entire stack is slated for a 'makeover'!!!

Dhiraj

If you are looking for solutions for your home, contact us about our design, build & decorate services.

Monday, February 17, 2014

The Trials and Tribulations of building a Garage - Part 1

In the summer of 2008, I started building a shed to replace the crappy metal shed that came with the house. I was assisted by my Father who was visiting at the time and he gave me creative input and reined in my flights of fancy. See the entire build here.

The shed served me well for the first couple of years, then slowly became a repository for my ever expanding collection of tools. Then I got busy doing work everywhere else but in my own home and the shed slowly became a dumping ground in between jobs. This winter put things into stark perspective. I have some of my equipment under tarpaulins and some just dumped in the overhang near the shed.

A recent job necessitated the manufacture of cabinet doors (on which I hope to do a more comprehensive post) which I was forced to do in one of my customer's place. I would've preferred to do them in a more controlled environment.

Therefore - I need me a Garage / Wood shop / Workshop. Stat!!!!

In the city of Brampton, one is allowed an accessory structure 10' x 10' without the need of a permit so long as it meets with all zoning requirements. The general ones are 2' from neighbouring property lines, maintain access to all easements for Hydro/Bell etc.

Since I want more floor space and would like to have a sub panel installed so as to have sufficient power to make adequate amount of sawdust, I would have to apply for a permit to build said Workshop. I would also like said workshop to have some source of heating. Wood would be the first choice, but again zoning issues are thrown into play.

My initial plan was to have the workshop in the side yard just behind the window on the second level and projecting 7' proud of the house's rear wall. This would allow me a workspace of 12 feet wide x 24 feet long while still maintaining 2' from our shared fence. The workshop would have garage door at the front and rear, enabling me to store trailers (Can you say 'Airstream') in the rear yard. The gate that I built in 2008, also with Dad, will have to go to allow access to the garage. I'll rework that at a later date.

This is the plans that I drew up for the Garage at the side of the house.


Armed with this drawing and a framing plan, I approached the City of Brampton's Building Department to seek out more information regarding this.

That's when I hit the first wall. Hard.

I cannot build the garage ate the side as per my plan. (Though multiple homes in the A,B,C & D section of Bramalea have such a garage at the side their house)
a. New zoning regulations require a clear 3 feet from the property line
b. It cannot be attached to the house. I must have a 3 ft. clearance between the house and the proposed garage.

I did however get the following clarifications. And they seem to be good.
A. I can build a Two Car Garage at the rear of the house.
B. I can have utilities connected to it.
C. I can build to 500 sq. ft. and That I like!!!

There is one catch however. My address falls under the Toronto Regional Conservation Authority on account of the Green Area / Creek / Storm runoff at the rear of the house. The TRCA is somewhere in York and I will have to pay them a visit as time allows.

And that's where I am at now.

More to follow..............

Dhiraj

If you are looking for solutions for your home, contact us about our design, build & decorate services.

Sunday, January 19, 2014

Random Things and Glaaves for Kissing!!!!

It was a crazy, mad 2013 and blogging was the very last thing on my mind!!

I went from one large project to the other, realizing a little bit late into the project that the best things that complement the 'after' pictures are the 'before' ones.....

We had family visiting from Spring through Fall. Seven family members in total, three weddings and a whole lot of outings... Getting home in time took precedence over getting the pictures. Something I regret now as some of the projects were a sea change from their original state.

Nevertheless.

I finally got back to my on and off washroom project this weekend. I slapped on the drywall and threw on the first coat of setting compound. I will be putting on the subsequent finish coats through the week.


All seams and screw holes covered with 90 minute sheetrock. The setting compound strengthens the joints and does not shrink like regular drywall compound. Here's a tip I got from watching the pros at work. Add a few drops of dish washing liquid to the mix to enable the mix to flow smoothly on the wall.

This is looking in from the door. The available space for the vanity is 24.5". I plan on putting a wall hanging sink at 39" high instead of the standard 32". This is more comfortable for adults and grown kids.


The toilet rough in was set by my plumber a year ago after I had tiled the floor. The sequence is slightly in reverse to how washrooms are normally built. Not sure why I did it this way, but I suppose I did what I did when I could do it. 


Looking in to the shower stall. I got this unit from Rona at a great deal as it was a display piece. Almost CAD 500.00 off retail.

I've learned so much more since I started building this washroom. I would've done things quite differently now, armed with the information that I now possess. But I will make it look good.

That's not hubris, but merely an inability to do a crap job!!!!

On another note, I stepped into the local Dollarama to buy a pair of vinyl gloves. I wanted to slip them under my regular gloves as I was to hand mix a batch of Deck-Mud for a 40 x 40 shower base.

I located an associate and asked where I could find vinyl or latex gloves. He looked at me and in a fairly thick accent said "Aisle 9, glaaves for kissing!". I was quite sure that something was truly lost in our mutual translations, and I reiterated my need. "I'm looking for any thin waterproof gloves that I can wear under my regular gloves". I was fairly adept at kissing, and fathomed a guess that wearing gloves while kissing might be a new fetish of some sort.

He looked at me, perplexed at my apparent stupidity and stated once more.

"Aisle 9. Glaaves for kissing, wassing, cleaning."

Ah!!! Kitchen gloves. Thank You!!!!! 

Dhiraj

If you are looking for solutions for your home, contact us about our design, build & decorate services.

Related Posts Plugin for WordPress, Blogger...