Tuesday, September 15, 2009

Trailer Trash - Part Three

I did not do this post in the right sequence as I just could not locate the photos that I knew that I had taken..

Anyhooo... I found them!!!

This was one of the last things that Dad and I did prior to his departure to Bombay.

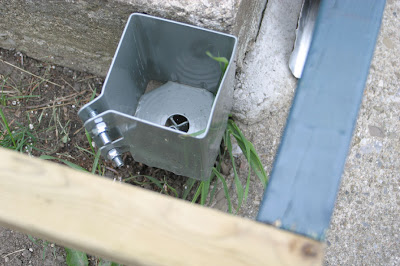
We isolated what would become the chassis of the trailer and discarded the remainder of the frame. We used some of the rubber caps from other parts of the frame to seal off any openings that would allow the ingress of water.

I have to start building the box one of theses days.


Trailer Trash - Part Two

I sat down today and prepared some conceptual drawing of what I would like the trailer to look like. The drawings are more or less for me to decide construction details as well as proportions of the trailer. In my earlier post I mentioned that I wanted to base the unit on the iconic Radio Flyer Wagons. I think that I more or less got the unit to look like the Radio Flyers, and I even christened the as yet unborn trailer, "Brampton Flyer"

Have a look!!

I tried to match the look as closely as possible

The Ventilated floor is an attempt to keep the weight down

The "Brampton Flyer"

Tuesday, September 8, 2009

Oh! Oh! Canada

Just heard this on the radio and had to give props to Luke Boyd AKA Classified from Nova Scotia. This is a damn good song and says it all.

Oh! Canada! We stand on guard for thee!!!!

errr.... What are we guarding????

Tuesday, August 18, 2009

More Shedonism

The shed is almost done with most of the interior fittings in place. The doors have been readied and Dad has painted both sides with the weatherproofing paint. I've been having trouble getting a matching set of hinges to the pair that I have in possession. I'll have to work something out....

Full frontal shot. My lawnmower will be happy to spend Winter indoors. It told me so!!!!

From the side

Shingled roof

Dedicated storage for my shop vac

Dedicated shelf for my fuel canisters

I used the wall cavity on one side for my garden waste bags

Monday, August 17, 2009

Trailer Trash - Part One

I'm not sure at what point I had decided that I needed a trailer to tow behind my bike. Maybe it was when Layla finally graduated to a real cycle that enabled us to start cycling to progressively greater distances. Anyways what I need (want), I cannot normally afford, so I gravitate towards making stuff. However with the very little time that I have being divided between taking the girls cycling and swimming and the rest in construction..... the prospect of building that trailer seems further and further away.

Till yesterday.

I found this left out for garbage collection......

A fully functional child carrier made by our very own "Chariot Carriers" in Alberta. Oh Joy!!!

It's an amazing piece of tech with cast plastic wheels shod with street tyres and with fully sealed roller bearings attached to a solid axle. The frame is aluminum so it will make for easy working. The only problem is with the hitch that attaches to the cycle, but that will be rectified.

I ripped off the protective shell and it is now laid bare for hacking.

I plan to make the trailer look like the Radio Flyer Wagons.


Tuesday, August 11, 2009

Shedonism

This summer I decided to build a smaller auxiliary shed for my Lawn Mower and garden tools. It would be a lean-to against the shed that I had built last summer. Dad and I poured the concrete pad a couple of weeks ago and while the concrete was wet, we set a small garden plaque into the pour for a touch of whimsy.

We chose to 'Grow Giggles' as we will get a lot of Free Laughs when people see the state of my garden!!!


Yesterday, I built up the frame out of balance 2x4' that I had around the place. That's not bluwood you see, but regular and PT lumber that Dad coated with a coat of Weatherproofing stain that was sold as a mis-tint at the Re-Store.

The plan is that the vacuum cleaner will go on a shelf on the right, below which will be stored my off-season tires. On the Left will be the Lawn Mower, above which on a small shelf will stand my fuel for my gas powered equipment and above that will rest my ladder on two hooks.

I will use one of the in wall cavities to hold the lawn waste bags. I have not as yet decided what I will do with the others. All of my garden implements will hang from the two doors, that we will start building tomorrow.

Curb Appeal - Part 4

Not much progress really, but what does not seem like a lot, actually took three whole days to complete. I wanted the front porch to be free of any visible fastening system and this is what took all of the time. I used Simpson Strong-Tie Deck Board Tie (DBT1Z) to hold the boards in place. The system took a longer time that the traditional method of fastening the boards from the surface down. The results though are quite different. There will be no wear or splintering that is normally evident when screws are driven from the top.

Still a long way to go.

Wednesday, July 29, 2009

Lucky Luke - Eurokids

I remember first reading Lucky Luke at my neighbour Mr. Robert Dango's house. Incidentally, U. Bobby is from where I get my moniker - Bob!!!

Lucky Luke, penned by Morris (real name Maurice de Bevere) saw it's best books during the time that it was written by Rene Goscinny. Since Goscinny passed away, Morris collaborated with various other writer and kept the series alive. The series are being currently done by Achde & Gerra. It is said that Achde apprenticed with Morris and was a natural choice to take over the reins following morris' passing in 2001.

Pity that we did not see the same thing done with Herge's Tintin.

Anyhoo these comics have been out of print for the longest time, till British publishing house Cinebook started releasing them from 2006 onwards. Needless to say that I've been collecting them faithfully.

Recently, while checking Wikipedia, I found out that a publishing house in India named Eurokids has just released a 24 set of Lucky Luke. Thankfully these differ from the titles that Cinebooks has released and me wants so badly.

I've set the wheels into motion and thanks to my most wonderful cousin Christabelle, should have them soon enough. Cannot Wait!!!!!!

They are also available as 3 in 1 sets. But honestly - would you pass up on the amazing cover art????


Curb Appeal - Part 3

After an agonizing period of trial and error in getting the levels of the framework, we finally drove over to Rona and got the deck boards. Rona had a 10% off deal on PT lumber till the 28th and we got this done in time. We've only thrown the planks on to determine what needs to be cut and to give the planks some time to dry a bit prior to screwing them in place.

Dad and Mum have gone over to A. Joy's for the remainder of the week as the forecast calls for rain. So I will be taking a break as well.

The boards all laid in place. The funky blue is a mis-tint that I got from the restore for CAD 15 and Dad coated the entire framework including the supports so as to offer additional weatherproofing.

Lynda and I took some chairs out and sat out all evening to get a feel of what an evening out on our front 'porch' would feel like. It feels good!!!!

Saturday, July 18, 2009

Curb Appeal - Part 2

I finally got work started on the Front Porch. Dad and I pounded in the two support spikes for the pillars that will hold up the trellis over the main door. We then got started on the base. I was forced to use 2x4s as opposed to the preferred 2x6s due to the existing concrete pad. This 'retrofitting' has opened up a brand new set of problems that I have to work around.

We started by making two separate frames, each 6' x 12'. That makes my porch a whopping 6' x 24'. While the frame just near the main door is supported by the existing concrete pad, the area under the Bay window is free hanging. We had rented a lawn roller and a manual tamper that we used to level the ground and then started using the slate flagstone and concrete blocks that I culled from the sit out the the PO had made at the end of the garden.

And that is the extent of the work that I've done to date. Pictures below.
Post pounded into the ground to accept 4x4 posts

The Frame in place. Big!

Blocks ready to be placed under the frame

Not to do with the porch, but this is where the bricks and flagstones came from. We filled it with the old sod, rolled it flat, put 8 bags of topsoil, sprinkled lawn seed, kept it moist for 7 days and Voila!!! Grass!!!

Gratuitous Fabulousity

I photographed this image this morning while passing through Queenston on the way from Niagara Falls to Niagara-on-the-Lake. Methinks it came out well.

Specifications as below
Camera: Canon EOS 10D
Lens: Canon 50 mm fixed focal length
Shutter Speed: 1/90 sec
Aperture: F2.8
Flash: No

Zoom in for a better look!! Feel free to download and use it as your wallpaper or what not!!!

Wednesday, July 1, 2009

Shed Build Diary - 15 - Let us Shingle Together

Tis was not the old month of May. Nay tis was somewhere between June & July and our voices were joyful but definitely not gay!!!

Dad and I finally finished the shingling of the shed. This was to be done last year, but I was not willing to pay CAD 25.00 per pack when I could've got the same from the ReStore at CAD 10.00. All I needed was patience. This paid off in January when I got 4 packets of shingles for CAD 8.00 per pack. All I needed now was the time and the inclination.

I had to re felt the roof as the old layers were trashed by old man winter. Trying to work around the rain that we had this week was another pain, but we did it and the shed is finally 100% done.

Related Posts Plugin for WordPress, Blogger...